How to draw hair Master the Basics to improve your skill! by Sushirollw Make better art CLIP STUDIO TIPS
Table Of Content

Thelightest value can be left as the white of the paper, and the darkestvalue is just to the right of the face (our right, the model's left). The Sally Field blog is dedicated to highlighting all things beauty including makeup, fragrances, hair care, skin care and more with some lifestyle elements mixed in. This will help you identify areas for improvement and gain new perspectives on your hair drawing techniques.
Advanced Techniques for Hair Drawing
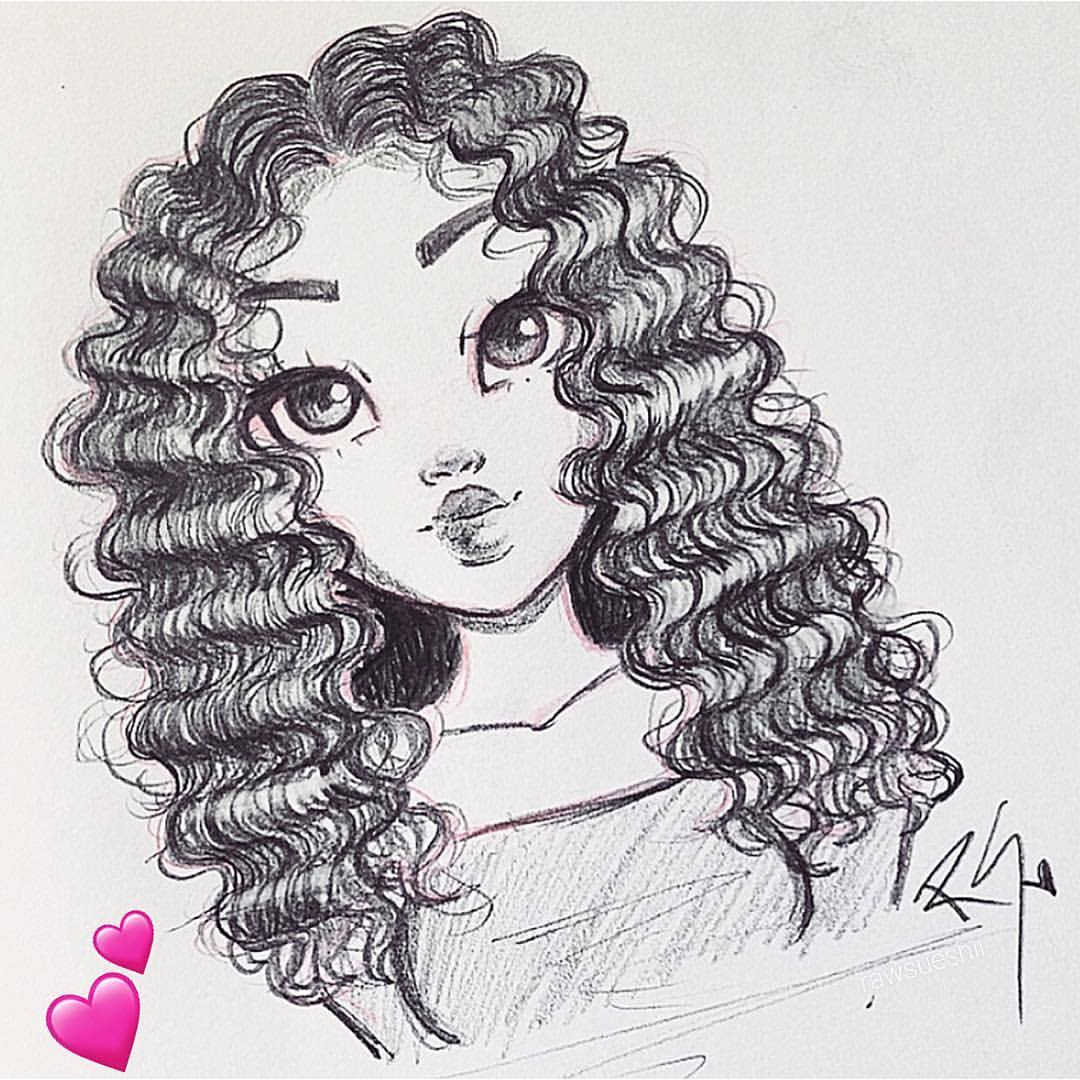
The only exception with straight hair is that we're likely to see less dramatic changes in value. We'll still see contrast between darks and lights, but this will happen from layering instead of within each "clump" of hair. Explosive —but not too much, curly hair is voluminous, hard to control and, many times, hard to comb! Fluffy, soft, playful and gorgeous, those are some adjectives we can think about for curly hair. • My first step was to draw the outline of the main lock (the one which will be the base of our drawing), following the direction in a S shape. Afterward, fill in the shapes of the hair with varying lines to give it texture, volume, and depth.
Step 14
The action should be guided by the source image’s depiction of shadowing in the hair. As the hair comes out of each overlapping moment it becomes lighter again and slowly flows into another moment of the hair grouping. Keep in mind the action we are using with our pen is light strokes with moments of harder strokes as we come to the shadowy areas. These segments, within the source image, are broken up by the shadows in the hair.
Step 3
'Massive hair' and 'really, really orange skin': primary school children draw Donald Trump – with Telegraph cartoonist Bob - The Telegraph
'Massive hair' and 'really, really orange skin': primary school children draw Donald Trump – with Telegraph cartoonist Bob.
Posted: Thu, 12 Jul 2018 07:00:00 GMT [source]
If you want to add some variation to the hair texture, then try mixing up your pens with broader and finer types. Continue to fill in the hair with texture, adding more lines to the hairstyle to indicate volume. Let us shift our focus to the hair on the top of the head as we transition to the right side of the hair. We want to analyze the source image and see how the hairs sprout outwardly from the top of the head toward the left and right directions towards where the hair falls. What we want to do is very loosely draw the shape of the hair outline whilst we use our source image as a guide for accuracy.
Principles of Art – Understanding the Principles of Design in Art
The third and fourth steps are combined and are executed at the same time. Before we begin the process of drawing the hair, we need to be sure that the structure of the head is drawn in place. The structure of the head dictates the shape and flow of the hair and should be defined before we begin drawing the hair.
In this way, you can make sure that every linevisually leads to another line in the drawing. In order to draw hair with flow, you need to be aware of the structure underneath. For long hairstyles in their resting state, the hair flows down, hugs the head and wraps around the shoulders.
Step 1: Outlining the Basic Shape

This will give the hair some detail and add depth to the whole haircut. Don't press too hard, and don't make the lines too tight. Draw the direction of the hair gently flowing down over the shoulders. Keep in mind that you're not drawing the single hairs here, just their flow. Forexample, the light must look like it's coming from the same directionand have the same intensity or brightness throughout the drawing. Drawing the shapes specific to your subject creates a likeness.This is true no matter what you draw, whether it is a still life, portrait or figure.
New Official Articles
For this reason, we'll concentrate on drawing the shape without all of the stray hairs. These stray hairs can be added after the general shape has been drawn, but more on this in a moment. But by breaking down the steps, we can simplify the process a bit. If you know how to see hair in terms of shapes, lines, and values then it becomes just like drawing anything else.
BHM profile Zimbabwean roots: Graphic design professor draws inspiration from hair salons - The Commonwealth Times
BHM profile Zimbabwean roots: Graphic design professor draws inspiration from hair salons.
Posted: Wed, 19 Feb 2020 08:00:00 GMT [source]
Step One: Sketch the hairline
Forexample, some curls can be thought of as cylinders, and can be renderedin much the same way. Notice that both the curl and the cylinder have ahighlight, halftone and shadow area. The core shadow on the curl issomewhat obscured by its texture.
Each hair comes from a specific point and grows in a different direction. Even when the hair is very long, the gravitational force eventually brings it down. Celebrating creativity and promoting a positive culture by spotlighting the best sides of humanity—from the lighthearted and fun to the thought-provoking and enlightening. Starting at the hairline, sketch a line to indicate the parting of the hair (whether it is in the center or to the side). Next, sketch several thick, long locks of hair extending from the top of the head to the shoulders (or wherever you prefer).
To control the value fully, we'll start with a harder 2H pencil and develop the locations of darkest value, the mid tones, and the locations of light value. We'll do our best to preserve the areas of strongest highlight, allowing the white of the paper to do the work for us. We understand forms because of the manner in which light interacts and behaves on them. Therefore, we understand forms in a drawing through the use of value.
In dark areas, don’t be afraid to press hard (I used a 6B to 8B for these areas). To bring out highlights, flatten your kneaded eraser and swipe it in the desired direction. The eraser will become too dirty after the first swipe, so fold it in and flatten after each stroke.
Again, try to notice the overlapping moments where the hair is clumped together and has a wave-like motion over another section that develops underneath it. This will develop a sense of lightness or shine as the light has something to deflect off of. With your ballpoint pen, we will begin to shade the areas where we can see the shadow. Shade the haircut in a more definite way, drawing shadows between groups of curls. Draw the direction of the hair, creating the 3D form of the haircut.
Now that you have the basic structure, strands, and volume, it’s time to refine the details. Pay attention to smaller elements like flyaway hairs, wisps, and stray strands to add a sense of realism. Understanding these elements will help you create more accurate and realistic hair in your drawings. Be patient and understand that drawing hair is slow process. Take your time and allow the drawing to develop gradually.


Comments
Post a Comment